Top 4 Watermark Software for Mac
PicWish
If you are in search of a top-notch and user-friendly watermark application for your Mac, look no further than PicWish. This application provides an “add watermark” function that empowers users to personalize their watermarks with their preferred text or images. The feature also includes a variety of editing options to fine-tune the watermark’s appearance, such as adjusting opacity, color, font, size, and rotation. Furthermore, users have the flexibility to choose the placement of the watermark on the image or add multiple watermarks if necessary. In addition to its practicality, PicWish is a useful and flexible tool that can help users protect their intellectual property, brand their work, or add a personal touch to their images.
Follow the steps below to learn how to remove watermarks from a photo using PicWish.
- Get the app from your Mac’s App Store or just click the download button below.
- Open the app then choose Add watermark.

- Upload your image and hit Start.

- Finally, add your watermark whether a text or an image then click Save All to get your image.

PhotoBulk Lite: bulk watermark
PhotoBulk Lite is another free watermark app for Mac. It allows you to protect your photographs by adding a watermark. Furthermore, you can customize your watermark by changing the text font, style (bold, italic, underline), color, adjust the opacity, and much more. However, unlike other apps, this app does not let you overlay an image as a watermark on your file. Follow the steps listed below to learn how to watermark your file using this app on your Mac.
- Once installed, open the app and hit the “Plus” icon to import the file you want to edit.

- From the editing section, type your watermark and apply it into your image. You can change the font style, size, adjust the opacity, resize, and more.
- Finally, hit the “Start” button on the lower right corner interface to save it on your Desktop.

Watermark PRO
Another watermark app for Mac that you can use freely is Watermark PRO. This app offers self-explanatory and intuitive features. It allows you to add text, logo, map, codes and lines to your photos that will be used as your watermark. Aside from that, you can adjust the photo’s transparency, add shadows, change the font color, style, and many more. To learn more, refer to the guide below.
- Open the app, import the image you need to edit by clicking the “Add Image” button on the upper right corner interface.
- Choose either from its features (text, lines, logo, QR codes, and map) to be applied to your file as a watermark.
- After that, hit the “Start Processing” button and save it on your destined folder.

uMark
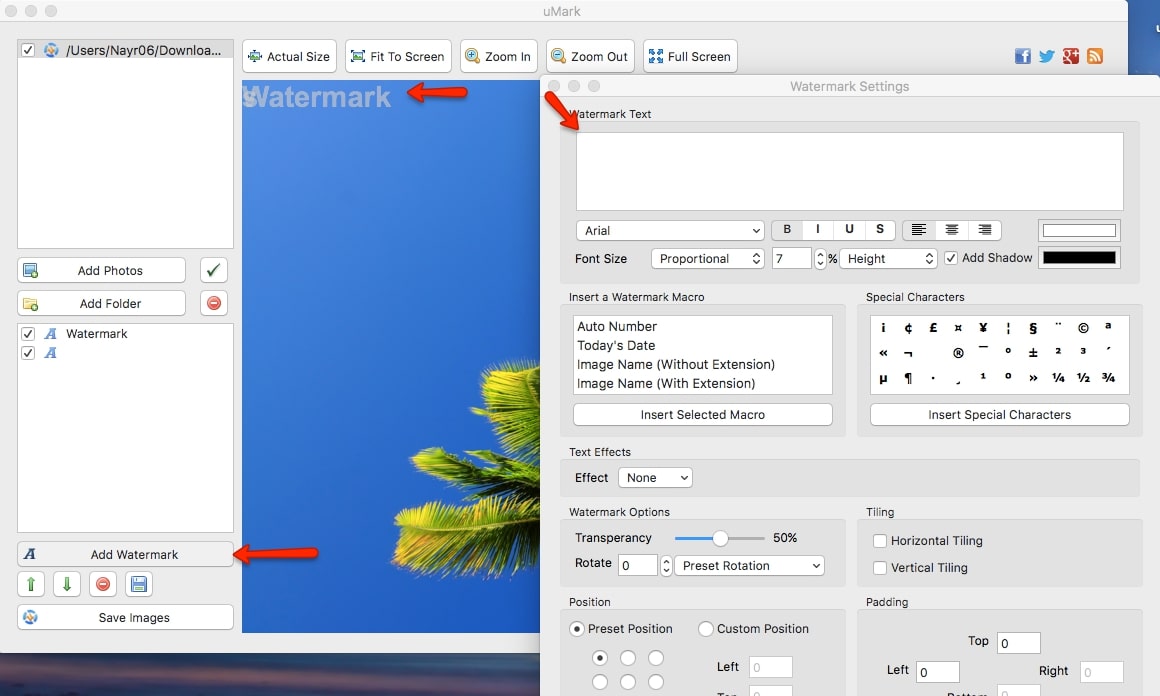
uMark is another great free watermark software for Mac. This is a simple to use tool that lets you watermark images of any file formats such as JPG, PNG, TIFF, and BMP. It allows you to add an image, text, shape, filter, and much more that will serve as your watermark. It offers a user-friendly interface that is perfectly designed for beginners who want to protect their images. To get started, here are the steps you can follow.
- Install the software on your Mac to start editing.
- Open it and hit the “Add Photos” button to import the image you need to add watermark.
- Once done, choose from the “Watermark” options and select the text, image, codes that you want to add for your image as watermark.

- To process and save the edited image, just click the “Save images” button.

There you have it. You can now pick the best watermark software for Mac from the tools mentioned above. No matter whether you want to remove a watermark on Mac, or add a watermark, you can find a suitable solution in this post.


Leave a Comment