A Full Guide to Use Apowersoft Background Eraser
I. Introduction
Apowersoft Background Eraser is a versatile program that uses AI technology to automatically and precisely remove background from image in a few seconds. It works for almost all kinds of real-world photos and graphics, including persons, products, animals, cars, homes, trees, texts, logos, icons, stamps, and many others. To learn more about the functions of this program, check the content below.
II. Sign up/Log in
1. Open the software, and click “Login” button to log in Apowersoft Background Eraser with your account.
2. If you don’t have an account, please click “Sign up” to create a new account first.
III. Remove Portrait Background
1. Click the first “Upload Image” tab. It’s only available for removing portrait background.
2. Then import a photo into the software from the computer.
3. Now you will get a cut out with a transparent background automatically.
4. If you are not satisfied with the auto-removal effect, you can click “Manually remove background” to edit the details with more choice and freedom.
5. Click the “Save” button to save the processed image into your computer.
IV. Remove Product Background
1. Select the second “Upload Image” tab. It can recognize products, clothes, animals, cars, logos, signatures, etc.
2. Upload a photo and then the image background will be removed automatically.
3. If you are satisfied with the cutout result, click the “Save” button.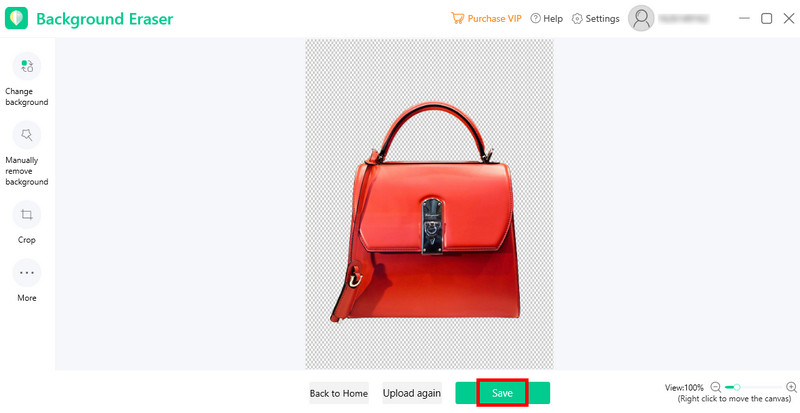
V. Create ID Photo
1. Click the third tab and import your photo.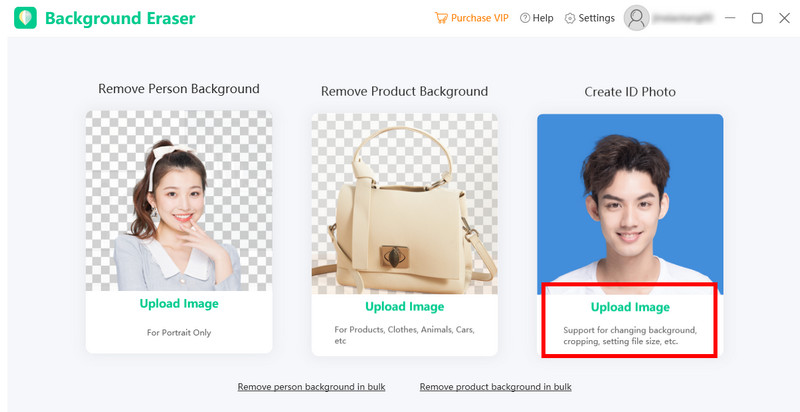
2. Then you will get an auto-cutout with a solid color background.
3. Next, click “Crop” feature to edit your photo to meet the standard size for your ID photo.
4. Finally, click the “Save” button to save it.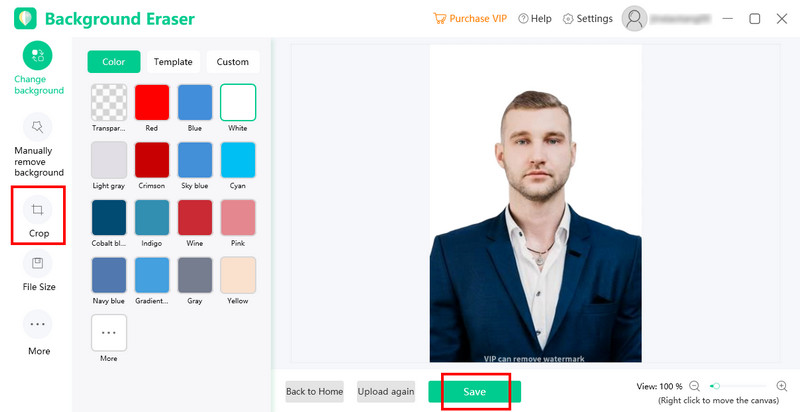
VI. Remove Background in Bulk
Choose between “Remove person background in bulk” and “Remove product background in bulk” accordingly.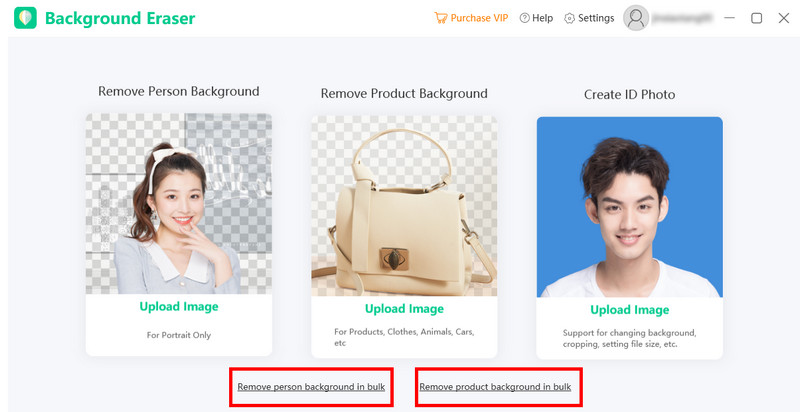
1. Click “Remove person background in bulk” or “Remove product background in bulk” below from the interface to import batches photos.
2. Once imported, click the “Yes” button to process your photos. In just a few seconds, you’ll see the backgrounds have been removed accurately.
3. If you are already satisfied with the results, save your photos by clicking the “Save All” button.
VII. Manually Remove Background
1. After auto-removal, click “Manually remove background” to edit details.

2. Use the “Brush” tool ro select “Remove” or “Keep” brush to smear the area you want or don’t want to remove.
Note:
You can drag the bar to adjust the brush size.
For the hardeness festure, the bigger the range is, the smoother the edge will be.
4. Use the “Magic Brush” tool to select the areas with the same color and tone and make edits independently. Adjust the tolerance level to increase or decrease the given color.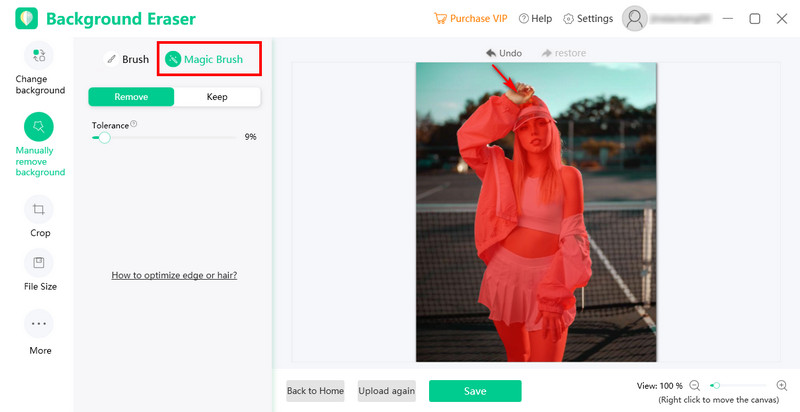
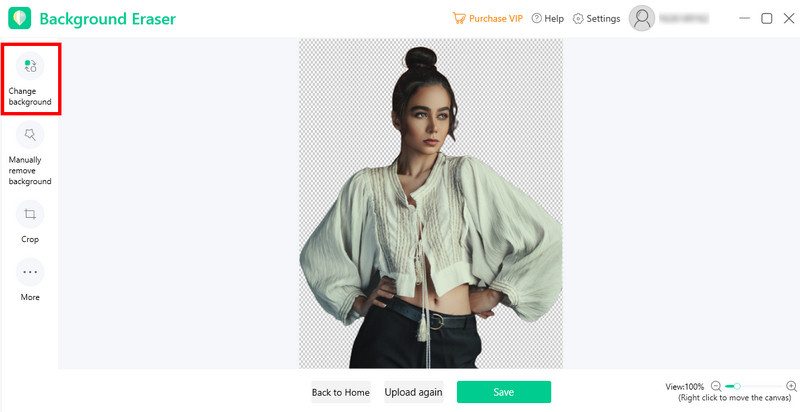
VIII. Change Photo Background
This stunning software also gives you the chance to change the background at ease.
1. Click “Change background” on the left, then the current window will be switched into a new one that allows you to add new background.
2. Click “Color”, “Template” on the top left to choose solid colors or well-designed background templates for your photo. Or you can also upload your own images as the background.
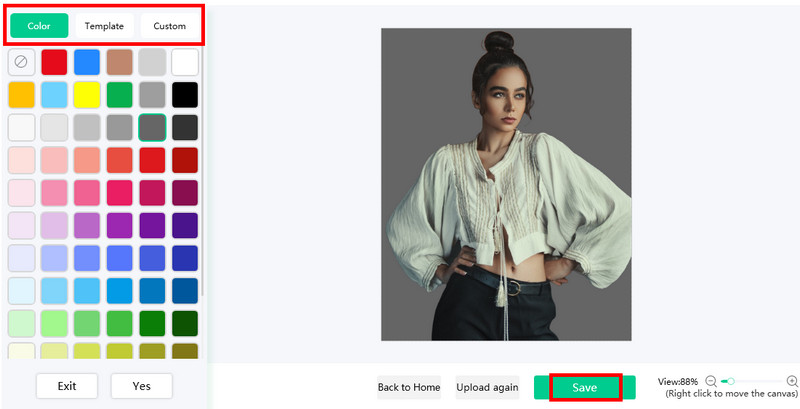
3. Click “Save” button on the bottom to save the image into your local disc.
IX. Crop the Photo
There are some regular, certificate and Ecommerce ready-to-use size available in crop feature.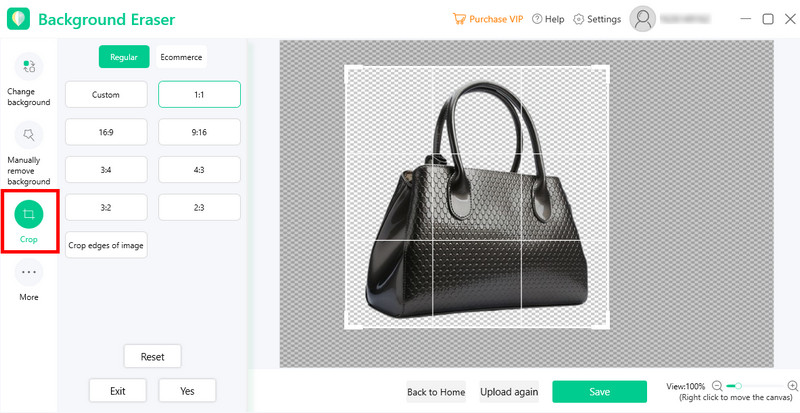
1. Click “Crop” on the left, you can choose one ready-to-use size or freely crop photo size.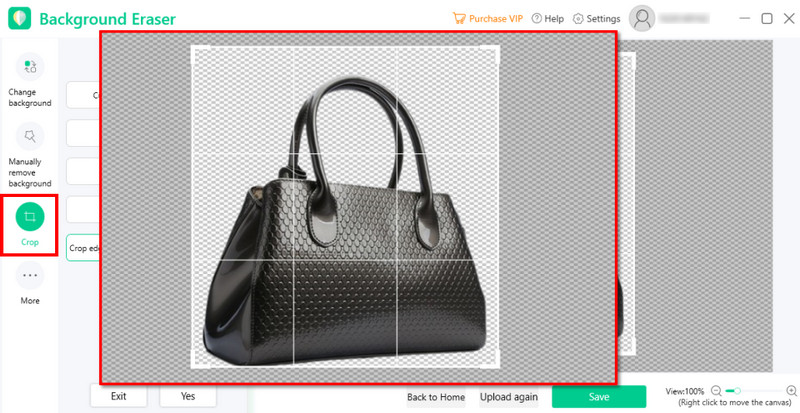
Note:
For the feature “Crop edges of images”, it will automatically cut off the extra edge part according to the size of the item.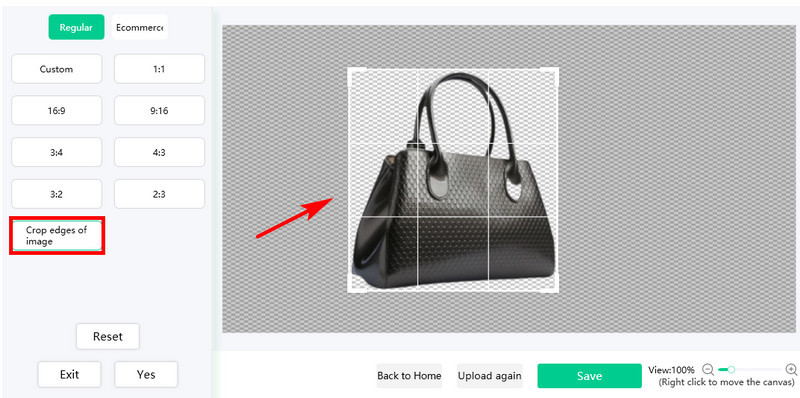
2. After that, you can zoom in and out, move, and rotate the photo if you want.

3. Click “Save” to done editing the cropping for your photo.
X. Set File Size
1. Click the “File Size” tool on the left.
2. Insert the (kb)size from the input box.
3. You’ll see the changes of your size photo once processed. Just click the “Save” button.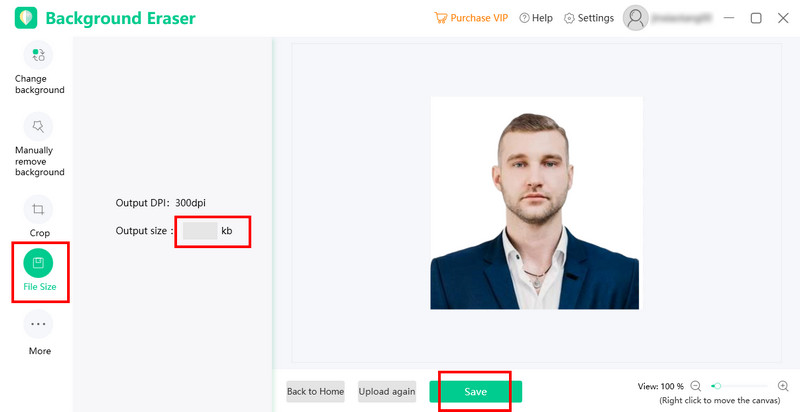
XI. Feedback
If you encounter any problems during use or want to give us some suggestions, please send feedback to us. We’d love to hear your suggestion and will help you solve the problem in time.
1. Click “Help” > “Feedback”.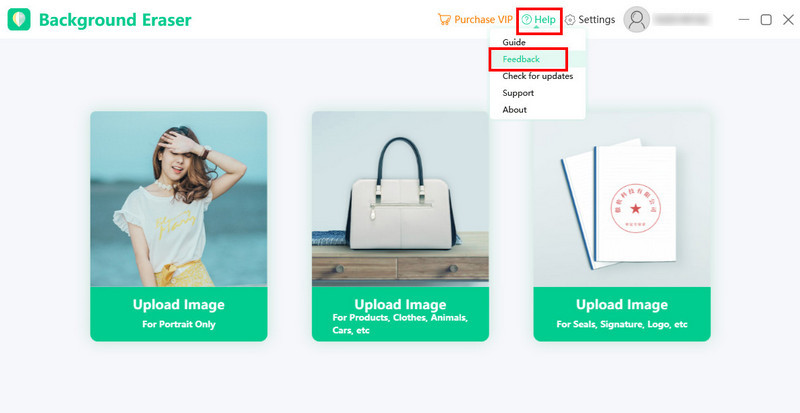
2. Write down the problems you encounterd below. And you can also add attachment, such as screenshots. After done, click “Submit”.
XII. Technical Support
If you think the manual guide is useless for you, and you want to contact our after-sale service, you can go to our Support Center or submit a ticket here. Our support will get back to you as soon as possible when they check your email.
Leave a Comment