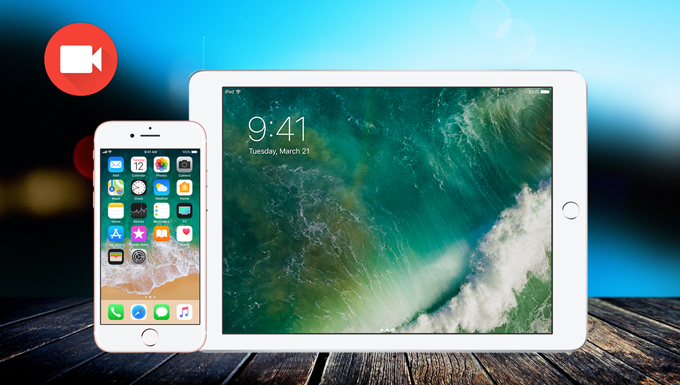
Initially used for the operating system of iPhone, iOS is the mobile operating system developed by Apple. Later on, it has been used as the uniform operation system for all Apple devices such as iPad mini, iPad Air, iPod Touch, Apple TV and many more. When using iOS devices, many of us may wonder how to record iOS screen to save a video call, make a vivid tutorial for guiding others or showing off their excellent skills in gameplay and others. Whatever the purposes are, they can check the solutions below to learn how to do this trick.
III. Video tutorial to capture iOS screen
IV. Record screen on specific iOS devices
I. Make iOS screen recording on PC
Basically there are two ways available for you to make screen recording on your iOS devices. One is by displaying device screen on PC and then making use of a screen recorder to do the screencast. Another is by directly utilizing screen recording app to do the screen recording on your iOS devices. Check more details after the jump.
The most commonly known way to make a screencast of your mobile is probably to project mobile screen to your computer and then record the activity with a handy tool – Apowersoft Screen Recorder Pro. This tool works as recording any activity on your screen. It also covers the screencasts on portable devices if you can manage to project the screen onto your computer. It also allows you to add annotations such as text, arrows, highlight, lines and many more while recording, which is indeed essential when making video tutorials. Upon creation of a screencast, you can then upload the video to YouTube or FTP for online sharing or storing. To know how to record iOS screen with this method, you can download this screen recorder and then refer to the detailed guide below.
Step One: Display your iOS screen on PC
Before start recording, you need to mirror your iPhone or iPad screen on computer, and then navigate to this webpage to launch Apowersoft Phone Manager online. After clicking to launch, you will then need to enable the java once it pops up.
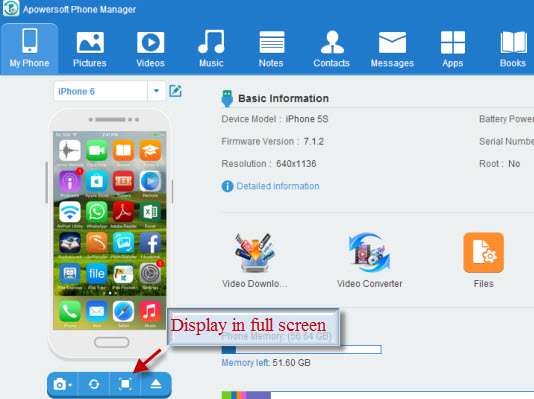
After that, this phone manager will appear on your screen, then you can connect your iOS device to PC via USB cable. To ensure the connection, please click “Trust” button to let the program access your device from computer. After that, You will see the mobile screen being shown on the main interface of this phone manager in real time.
Step Two: Start recording the screen on iOS
Now you can install and run the Apowersoft Screen Recorder Pro that you have just downloaded. After launching this application, you can follow the steps below to record iOS screen.
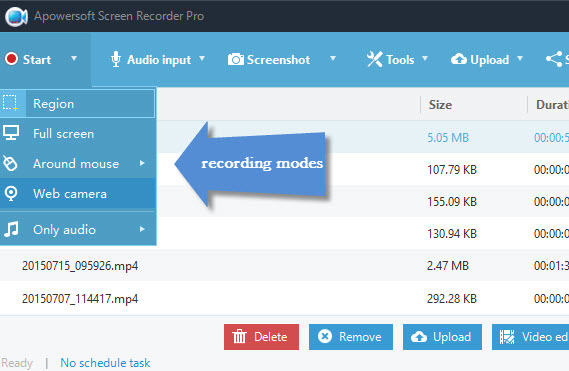
- Drop down “Tools” and click “Options”, then configure some necessary settings based on your needs. From here, you can choose the desirable output video format, hotkeys for recording, mouse cursor style and others.
- If you want to add narration to the recording, you can choose “Microphone” as the audio input.
- Next, you can back to the phone manager and click “Display in full screen” to view your screen more clearly.
- Now you can press the hotkey to start recording. If needed, you can use the editing options it provides to make some annotations.
- Whenever you desire to finish the recording, just hit the stop recording hotkey (F10 by default) and your record video will be saved automatically to the output folder. If needed, you can also upload the video to YouTube for sharing.
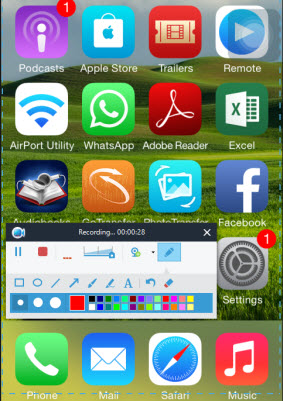
Above is the first way to make iOS screen recording, this way is quite useful especially in making tutorials or screencast that requires real-time annotating and uploading videos after recording. And if you desire to make screencast directly on iOS devices, you can then check the following method.
II. Efficient app to make iOS screencast
iRec, a simple to use screen recording app that only available on Emu4iOS store, enables you to record whole screen activity on iOS 7 and iOS 8 devices. Audio recording from microphone is also feasible with it. And perhaps the most shining feature is that it does not require you to jailbreak your iOS devices as the Display Recorder does. However, some users complain that the recorded videos may turn into black screen sometimes. In order to learn how to record screen with this iOS screen recorder, you can check the guide after the jump.
- Go to official webpage of this Emu4iOS store and find the iRec from the app list, then click “Install”.
- After installing, you can run iRec and then name the video you are about to record.
- Also, you can choose the bitrate, fps as you wish in settings. The higher value you set for video, the higher quality you will get in recorded video but it also takes more space.
- Hit the “Start Recording” button and then a red recording bar will show on the top of your device which indicates your screen is being recorded.
- Whenever you want to end recording, simply back to iRec and click “Stop Recording” button.
Tips: Please remember that the red recording status bar will also be included in your video and it does not support regional recording.
In case you may need to know how to record screen on specific iOS devices, you can refer to the guide from below.
III. Video Guide to Capture iOS Screen
IV. Record Screen on Specific iOS Devices
Record Screen on iPhone: If you own an iPhone 4S/5/5S/6 and do not know how to make screen recording on it, you can then check here to learn different solutions to do this trick.
Record Screen on iPad: When using iPad Mini or iPad Air to make video demos on screen, you can use QuickTime to record its screen on Mac, or utilize a screen recording app directly.
Record iPod Touch Screen: Given that iPod Touch provides amazing mobile gaming experience, you may need to show off your excellent skills or teach others how to accomplish certain tasks in games, then the best is to record a video demo for it.
Record Screen on Apple TV: Apple TV provides amazing visual experience with high resolution, if you need to record the programs on it, you can figure out how to do this screencast from here.


Leave a Comment