How to capture screen with audio?
Free way
To start making your DIY videos right away, the best method on how to record video with audio is by using Apowersoft Free Online Screen Recorder. It’s totally free of charge and does not have time limitation in recording. Utilizing it, recording gameplay, live streams, video chats and many others can never be so easier.
Record screen with system sound and microphone
With the help of this robust screen recorder, you are able to make a bunch of screen and audio recording without any computer lags in high quality. It allows users to record any selected region, full screen, webcam or picture-in-picture video. To begin with the recording, all you need to do is to set some options. First, click “System sound and microphone” under audio input tab, this will then allow you to record video and audio at the same time.
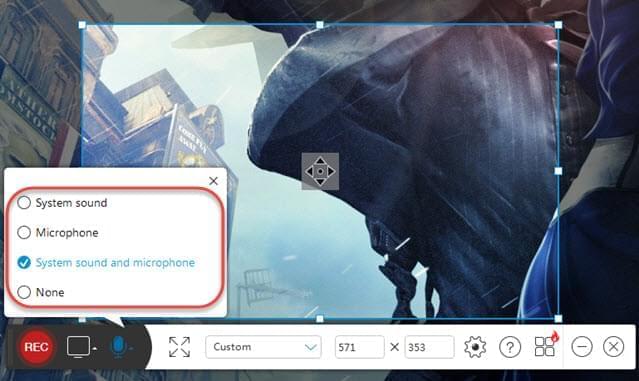
About to start, you can customize a special region or choose to record the full screen. Plus, if you want to adjust the speed of the video playback, you can also modify the frames by pre-setting the frames at the “Recording” portion under the options menu.
Record screen and speaker’s voice
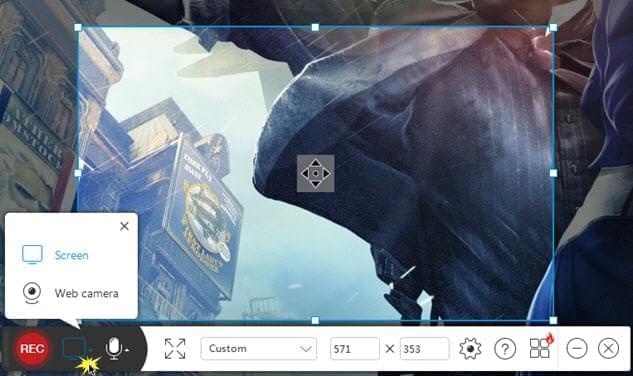
This free screencast tool also supports recording screen video with the speaker or user’s voice. This method will be suitable for those who makes video tutorials with narration for better explanation or commentary. To start with this process, we just need to hit the audio input tab, and select “Microphone” under it. After that you can start recording the screen as well as making some commentaries at the same time.
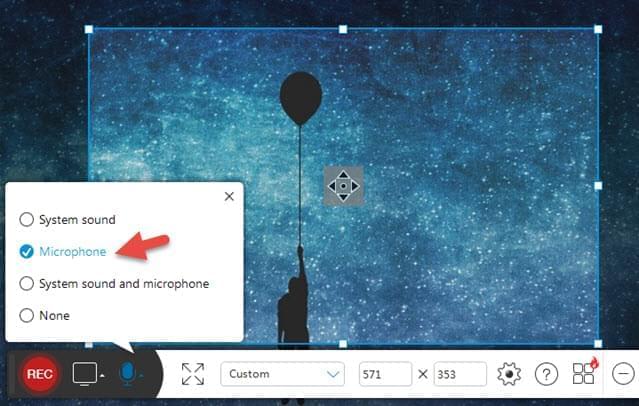
For better results, be sure to have a fully functional microphone, either a built in or an external one. Because the recording tool will be useless if you have a defective microphone.
Note: When you need to record screen with microphone, please plug-in your microphone before this screen recorder runs. Otherwise, you need to re-launch this tool to make it successfully detect microphone and capture it.
Professional Way
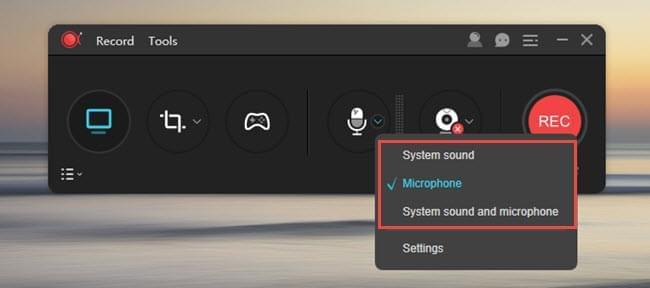
In case you need to record your screen with audio or add your voice to your recording, then here’s a tool that you can rely on called ApowerREC. This is a well-rounded screen recorder that is capable of recording your screen, webcam, and audio either simultaneously or individually. In recording your audio, users will be given various options such as the system sound, microphone, or both. Moreover, it also features other interesting functions that can help you record your screen activity even if you’re not around which includes “Auto-stop Recording”, and “Tasks Scheduler”.
To record your screen along with your chosen audio input, simply activate one of the recording mode like “Full-screen” or “Regional”, and then enable the “Audio” icon. Whenever you’re ready simply hit the “REC” button and the recording will start automatically. And to end it, just click “Stop” and your recording will be included on the recording list.
Extra Tips for You
- To properly record your audio, make sure that you select the right audio source. Also be reminded that your selected system sound or microphone device must be consistent with the default ones under your computer’s sound settings. In case the tool isn’t recording after hitting the “REC” button, simply refer to this guide.
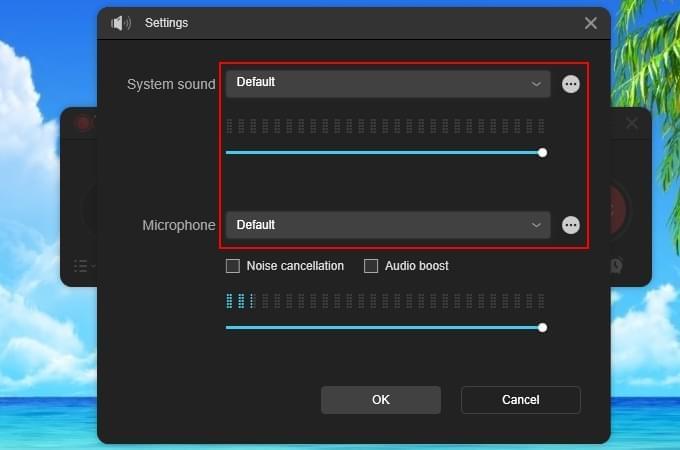
- In event that you need to use microphones make sure that you plug-in the microphone first before launching the app; otherwise the microphone feeds will not be captured.
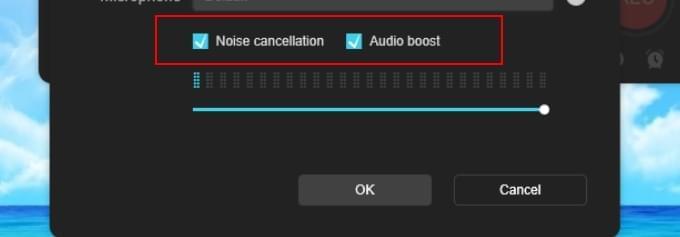
- To avoid distortion in recording voice/ microphone sound you can enable the “Audio Boost” and “Noise cancellation” before recording. Simply click the drop-down menu located besides the “Audio” icon, then head to “Options” and tick the box near the said function to finally activate these functions.
To record screen with audio for making an educational or an entertainment video is a fun thing to do. Just try to mix things up to create a unique video that will be appreciated by anyone who views it.


Leave a Comment